
I made this ulu knife about 10 years ago and it still gets used pretty often. It is solidly built and works great. Today I was looking through some old photos and found this sequence. I though it would be nice to share.
If you have the right tools, the shaping of the blade can be pretty easy. For example, after using the hacksaw to rough out the basic shape, it was easy to use the abrasive wheel on a bench-top belt sander to apply the finishing touches to the outside shape. I made a point to keep the blade as cool as possible while grinding. I had a more difficult time with the interior shape. Files did the trick, but a spindle sander would have made the work go much faster.
Below is the design I settled on after developing a number of others.

-
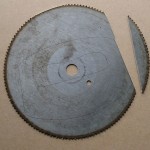
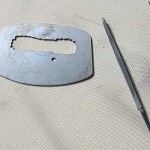
- I transferred my pattern to the blade and started cutting.
-
- My new hacksaw and blade made the cutting easy
-
- Second cut on the saw blade
-

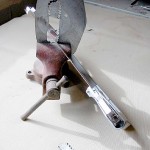
- A big C clamp holds the blade tight to the table
-

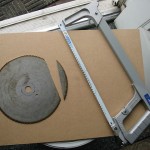
- Five cuts to get the basic outside shape
-

- Drilling holes with a drill press to cut the hole for the handle
-
- I tried to get the holes as close together as possible, not going outside the pattern
-

- More drilling – use oil as a lubricant for the bit to reduce friction – less heat
-
- Connect holes with hacksaw – requires hacksaw blade removal to fit it through first
-

- Inner handle is roughed out – outside contour smoothing started
-
- Outer contours completed with bench sander. Inner contour started with file – slow
-

- The benchtop sander works great. Round wheel is better than the belt for contours.
-

- Spindle sander would make inside contours easy. I started with files
-

- Finished inner contours with sander bit and a drill. Spindle sander would be better.
-

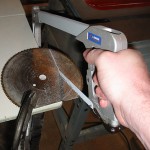
- Testing the feel of the blade. Nice!
-

- Benchtop grinder / sander makes the work easy
-

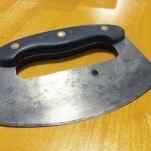
- The final blade with a sanded finish. Cutting edge was added with a file.
-

- Be careful!
-

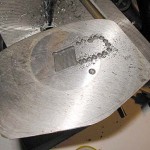
- Handle scales cut from phenolic material. Probably 3/8″ Micarta or G10
-
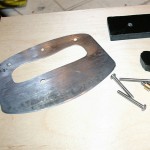
- Drill holes in blade first. Use as a guide for each handle scale. IMPORTANT: Don’t drill holes for both scales on same side of blade. Flip it over for the second scale.
-
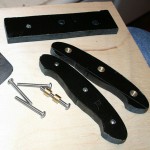
- With smaller holes drilled first in scales, use drill press with bit matched to brass bolster diameter. Countersink bolsters CAREFULLY. Don’t drill through!
-

- The screws pull the brass bolsters together and keep the handle scales firmly in place
-

- Another view of the screws and bolsters
-

- After the screws are tight, cut off them short with a hacksaw.
-
- The brass bolsters are smoothed off with the belt sander
-

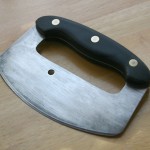
- Finished ulu after shaping handle
-

- Adding walnut oil to the handle darkened it up.
-
- Ulu knife by Russ McMullin
-
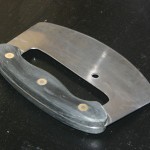
- My ulu after about 10 years of use.
Getting Started With Buckskin, Part 3: Tools for Finishing the Hide | Bone Awl
[…] and bite I made a hand held Dry Scraper (how I got the idea for this is covered in this post). I followed this tutorial to make an ulu from a circular saw blade, and just bevelled the blade with a file on one side (pictured). I didn’t want my blade too […]